New Transitions Overview: Changes With Appearance And Usability

SIMPLE TRANSITIONS
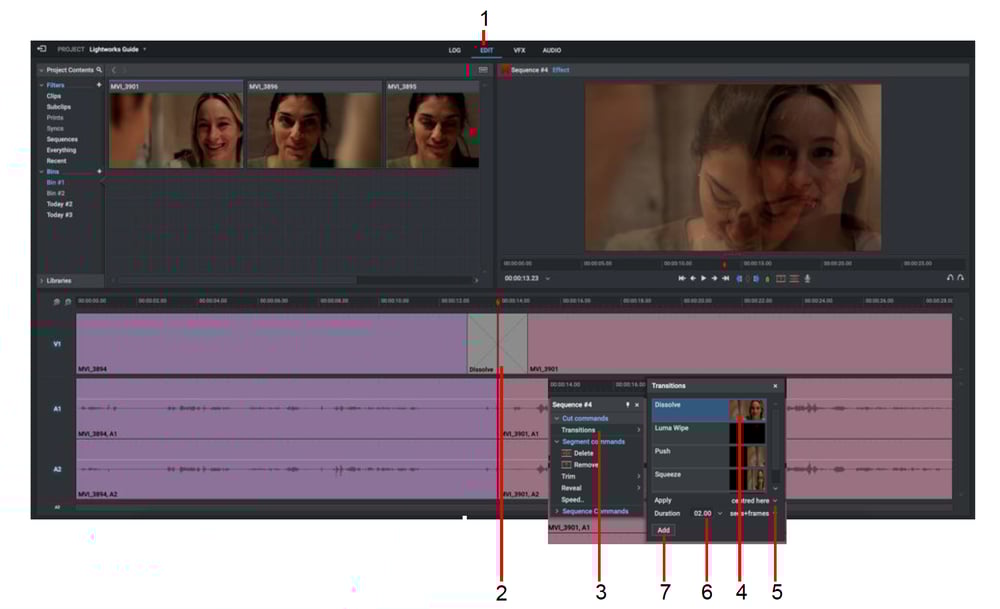
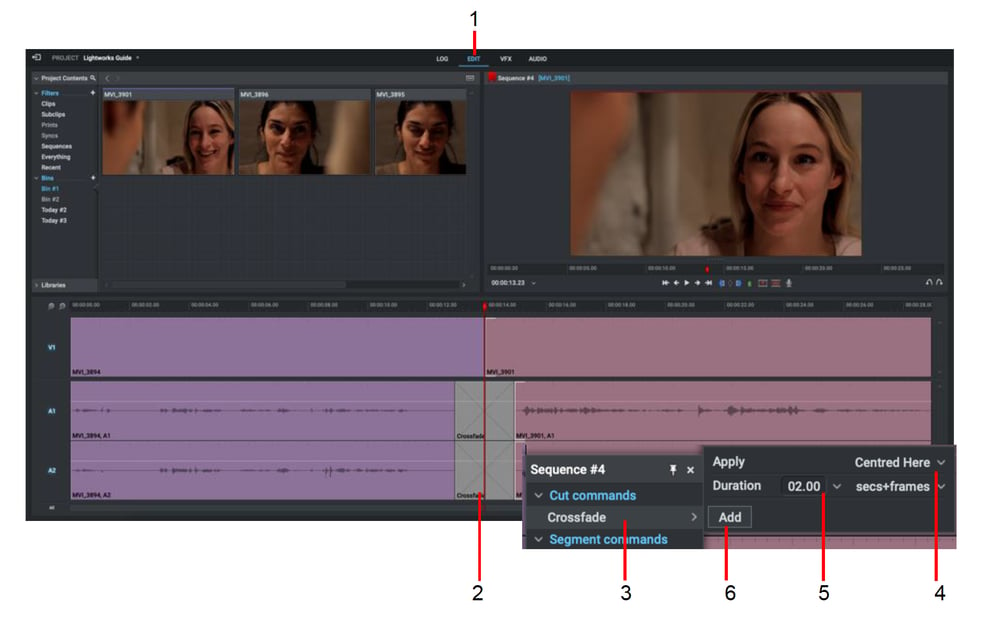
Transitions are a very simple and effect technique of smoothing the cut between two separate clips on the sequence timeline. Rather than switching directly from one clip directly to another, a transition can make for a smoother cut to convey a particular mood or time shift.

In order for a transition to work, there must be sufficient material available on both the outcoming and incoming clips on the sequence timeline for the effect to be applied. If insufficient media is available, a pop up appears to inform the user.

Note: The VFX tab is where you will add more advanced Video Effects. Once on this tab, click the ‘+’ icon to add more advanced Effects such as: Colour Correction, 3D DVEs, Green Screen, Mattes, FX Plugins, Blur, Sharpen, Titles and many more.


Adding a Video Transition

Adding-a-Video-Transition

STEPS
1. Make sure the Edit or VFX tab is selected.
2. Right-click on the cut point where you want your transition.
3. From the menu that opens under ‘Cut Commands’ select Transitions.
4. Select one of the following transitions: Squeeze, Dissolve, Wipe, Push or Luma Wipe.

5. Choose where you want the transition to start and finish from the drop down list.
The options are:
Centered Here: Applies the effect centered at the park position.
From Here: Applies the effect forward from the park position.
To Here: Applies the effect backward from the park position.

6. Select the number of frames you want for your transition to take effect from the Length drop down list.
7. Click the ‘Add’ button to add the transition is applied to your sequence.


Adding an Audio Transition

 
An audio transition is analogous to a video transition. Rather than switching directly from one audio clip directly to another, a transition can make for a smoother cut to convey a particular mood or time shift.

In order for an audio transition to work, there must be sufficient material available on both the outcoming and incoming clips on the sequence timeline for the effect to be applied. If insufficient media is available, a pop up appears to inform the user.

Adding-an-Audio-Transition

STEPS
1. Make sure the Edit or VFX tab is selected.
2. In the audio track, right-click on the cut where you want to add your transition.
3. From the menu that opens under ‘Cut Commands’ select Crossfade.
4. Choose where you want the transition to start and finish from the drop down list. The options are:
Centered Here: Applies the effect centered at the park position.
From Here: Applies the effect forward from the park position.
To Here: Applies the effect backward from the park position.

5. Select the number of frames you want for your transition to take effect from the Length drop down list.
6. Click the ‘Add’ button. The selected transition is applied to the audio tracks.


Resources and Support

Troubleshooting

If you experience an issue with your Lightworks installation, or something isn't working as expected, visit our FAQ page. If you do not find an answer to your question, you can refer to the Lightworks forum.

The Status window provides useful information for troubleshooting issues with Lightworks. You may be asked to open this when contacting the forums.